

SATSUKI, POTS, WATERING & SOIL
- bonsaisouthwest

- 6 days ago
- 9 min read
In this blog I will cover the the basics of making sure your satsuki doesn't dry out.
Satsuki azaleas are part of the Rhododendron genus. They naturally inhabit temperate regions of North America, Asia, and Europe.
In the wild, they are largely deciduous woodland plants that thrive in dappled shade and often grow in moist, acidic, and well-drained soil rich in organic matter.
• Satsuki azaleas produce very fine roots that do not respond well to drying out. On a single hot day, drying out can cause die back of the roots and possibly dead branches and parts of the trunk.
• Once there is root dieback and damaged roots, it’s easy to get into all sorts of trouble with caring for your satsuki. Overwatering being one of them. (We'll deal with that later in another blog.)
As with many things, prevention is better than cure so it is vital to cultivate a watering regime & environment where the chances of drying out is minimised in order to prevent the heartbreaking results of a dried out satsuki.
SUITABLE POTS FOR SATSUKI.
• When training young satsuki the choice of pot is going to determine how vigorously your tree develops.
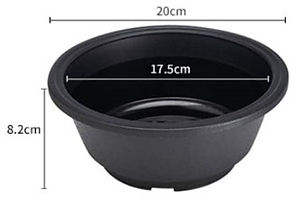
• Satsuki are often grown in pots that are deeper than you would grow other bonsai species. There is good reason for this. The deeper shapes have better drainage properties.
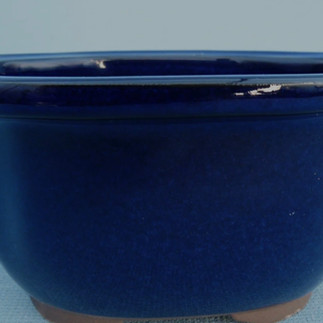
• Stoneware or terracotta training pots are ideal as they usually have good shape to encourage drainage.
• Some European terracotta can be very porous and sometimes too porous making them dry out faster and also prone to cracking in the frost.
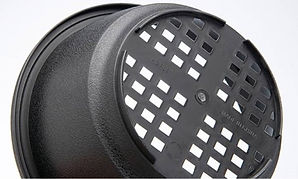
• I recommend the Japanese training pots which are less porous or even mica pots which also have good drainage and thermal insulation properties.
• Small or shallow pots can make satsuki care very challenging, so slightly larger or deeper pots are good options for providing satsuki with the steady water environment they need to thrive.


I DO NOT EVER RECOMMEND
using pond baskets or colanders.
While these have become popular for growing other species such as pines and other conifer species with naturally long and course roots, they are definitely not good nor needed with azaleas.
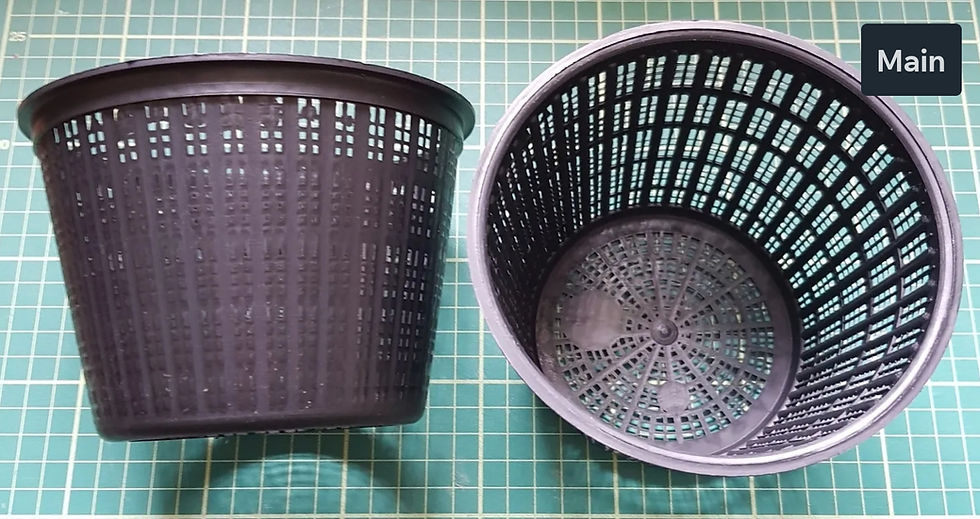
• The purpose of using a pond baskets is to encourage the tips of roots that reach the outside of the basket to die off and thereby encourage branching of the long roots further back along its length to make a more fibrous root mass. It also contributes towards having more oxygen in the root ball but not as much as you think. Good watering practice is much better at exchanging the fresh air in soils in pots.
• The roots of azaleas are already fine and fibrous enough so this "air pruning" treatment is completely unnecessary and can even be VERY detrimental to healthy azalea roots perhaps killing more than they help to produce.
• As far as improving the air content of the rootball, that should be achieved by using the correct type of soil and particle sizes and watering techniques.
• Indeed using a pond basket will mean the soil will dry out far too quickly and frequently. Some people will say they've grown their satsuki in pond baskets with no problem. This statement is usually followed up with a description of a punishing watering regime that has absolutely no room for any error at all. One bad mistake and its bye bye Satsuki.
• Pond pots will also have a habit of enabling water to run off the top of the soil and out of the sides of the pot therefore not soaking into the root mass at all. If this happens and goes unnoticed the tree will likely end up dead. Especially if you are out at work during the day.
Frankly its just not worth the risk they pose to use a pond basket.
Adjust your Watering Frequency Based on Temperature.
• This is straightforward:
• during spring and summer, if you see your azaleas wilting or drying out, water more frequently.
• When it’s around 20°C (70°F) and sunny, water azaleas once per day and gently sprinkle or mist them 1-2 times to help keep them cool. It will of course vary according to your own conditions so adjust to suit them.
• When temperatures reach around 22+°C most plants begin to start survival mode by either opening the stomata on the leaf surfaces to increase transpiration in order to cool the leaves.

• Or by closing the stomata on the leaves to prevent excess moisture loss in higher temperatures. It is around this temperature when roots begin to not function properly so be very aware of any signs of stress and act accordingly.
• When it’s 28°C+ (85°F) water twice or more a day as necessary and sprinkle or mist the trees an additional 3-4 times. The aim is really not about watering but more about cooling the plant down. So if the soil is still damp, concentrate on the misting to reduce temperature and cool the pots.
• In high temperatures the stomata will close to conserve water but the temperature within the leaves will rise because there is little or no transpiration happening to cool the leaves. This is when Satsuki are most at risk from losing branches or the apex as they abort areas that are difficult or it to regulate.
• Don't forget that paving slabs, shelving and the pots themselves can get much hotter than you think when they are in the sunshine. I have measured pot temperatures of over 50°C, which is of course, extremely dangerous to the trees survival.
Placement.
• During the growing season, selecting the right spot in your garden can help you keep satsuki hydrated and healthy.
• In spring, summer & autumn, select somewhere that is not too exposed to drying winds and strong sunlight.
• They like humidity and morning sun.
• They don’t like strong winds that dry the soil out or direct afternoon hot sun when temps get above 20°C (65°F) (some varieties can handle more sun than others so try and adapt accordingly).
• Putting up a suitable shade cloth around 40%-50%, or moving them to a shadier spot is the best way to help with excess sunshine.

SOILS TO USE
• Using the right soil is just as important.
• This is an enormous subject and everyone has their own theories about what makes a good soil for Satsuki. I'm not going to argue with anyone about this. Instead I will just let my trees do the talking. I'll keep this as short and simple as I can.
There are differences in soil needs between Japan and the UK. I will deal with my experience here in the UK.
• In general, if you have an established, imported satsuki that is growing in 100% kanuma it is best to continue with that media because it will not easily tolerate a sudden change to other types of soil mix. They may not even put new roots out into the new soil medium.
• Changing the soil can be done a little at a time at each repotting over several years but it does come with risk and so I don't recommend trying it unless you are confident in the techniques.
• Repotting should only be done when it has become difficult for water to percolate into the soil.
In the UK I have found it best practice to repot in the spring when the plants begin to show signs of ne growth. This gives the tree a longer time to recover before winter and avoids the stress of a summer repotting.
In Japan they used to repot after flowering in late May or early June. This has changed recently given the changes in climate and most Japanese now repot in spring.
• Repotting too frequently will weaken the tree and cause a whole lot of problems with branch dieback, slow growth and poor flowering.
• DO NOT repot on a schedule that was written in a book somewhere. Doing it every two or even three years as a routine runs a high risk of weakening the tree a bit more each time until one day it just doesn’t recover.
• Each tree must be treated individually. I have had satsuki that have not been re-potted for ten years or more without suffering at all. The tree must be given 3 or 5 years at least to recover properly from being repotted and root pruned the last time.
Covering the soil with a ¾-1inch layer of sphagnum moss helps a lot in reducing the risk of drying out after repotting. I recommend leaving this layer of moss on the soil unless the tree is going to be put in a show. There are many benefits to this including keeping the soil surface cooler, encouraging fine surface roots and maintaining moisture in the soil.
Soil for homegrown satsuki.
• The soil should be open and granular in texture, avoiding any additions like peat or ericaceous compost. These additives will not last very long before breaking down to dust and blocking up the air spaces. They will not have a very good air porosity factor (APF), which is essential to growing healthy satsuki in pots.
• Because azaleas prefer to grow in acidic media, the standard mix is 100% kanuma covered with a layer of sphagnum moss. Kanuma can be an unforgiving medium if you are not used to it. Water doesn't travel sideways very well in it so if the tree has a wide nebari, it is important to make sure water gets underneath it. Soaking in a deep tray of water will help that.
• Some people find 100% kanuma to be too expensive but you must weigh that with the cost of the trees and your ability to maintain the moisture content.
• Over the years I have experimented with many types of soil and I have found a mixture that is well suited to the climate here in the UK. It can be found in Robert Callahams book on Satsuki and is made up as follows. He has used this soil for many many years to grow spectacular satsuki.
Firstly gather your constituents together and sieve out all particles below 2mm from all the ingredients. This fine stuff will not be used in the mixture and will only clog up airspaces if left in the mix.
It can be used for taking cuttings.
I have given brands and pictures of what you are looking for as guidance for quality of product.

BARK-Playground bark or mulch like you find in DIY stores or garden centres is not suitable. Eucalyptus bark can contain oils that will kill the soil microbes. It can also lock up nitrogen depriving the plant of fertiliser. It may also contain chemical treatments.

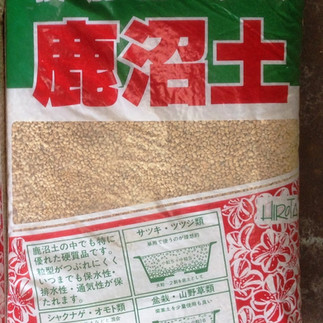


KANUMA- is an acidic soil from Japan with a PH of 5.5. It is very drying on your skin. Avoid breathingthe dust.

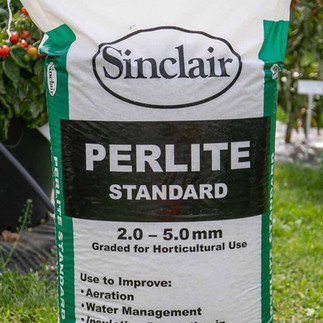


PERLITE- Comes in many grades from fine to course. The medium an fine grades are not suitable. Try and find the coursest grade you can.
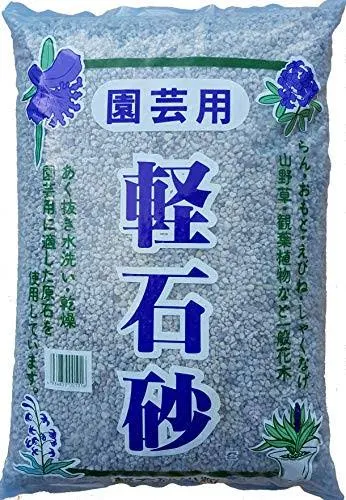


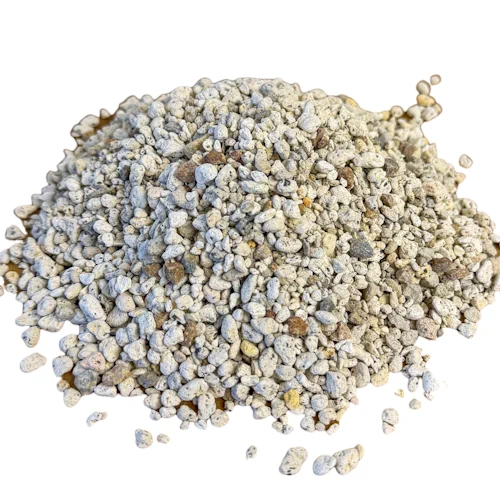
PUMICE- most pumice is chemically inert with a neutral PH around 6.5. However, some pumice can be slightly akaline with a PH of 8.0 so be careful.
EZO GRIT- is a buff coloured pumice from Japan.
THE CALLAHAM MIX
• 2 or 3 parts of Melcourt propagating bark depending on your conditions. 2parts for wetter environments and 3 parts for dryer. (Can be bought in 60ltr bags on Ebay or similar. Maybe even direct from Melcourt https://melcourt.co.uk/products/professional-growers/propagating-bark-2/
• 1 part Kanuma 2mm-8mm. Most bonsai nurseries or Ebay etc.
• 1 part course perlite. 2-5mm or 3-6mm preferably. (Sometimes difficult to find but in general the small bags from a garden centre are too small particles to be useful.) Chunky perlite 8-15mm is sometimes available but it is very expensive.
• 1 part Japanese Pumice or Ezo grit 2mm-8mm.

Mix these ingredients thoroughly. Keep everything dry and store in a dark plastic box. (If, after some time in storage, you notice some light mould don't worry as it is perfectly normal and not harmful. Just mix it in and use as normal.)
The soil mix can be used for any sizes of azalea in any stage of development. From cuttings to more mature trees.
Use as you would with any soil for re-potting. Working it into the roots with a chopstick.
As with any soil, avoid over compacting the soil into the pot.
Cover the soil with a layer of sphagnum moss to retain moisture.
This mixture maintains a good even level of moisture and is easily watered and re-wetted should it be allowed to dry out too much.
It allows for a natural environment of beneficial organisms to build up. This helps with nutrient exchange to the plant.
Because of the open texture of the mix I find it is not necessary to use a drainage layer on anything below a 15 litre pot.
Hopefully this has answered some of the questions that come up when discussing growing Satsuki azaleas.


Comments